All rescue training with the American Red Cross (A.R.C.) is centered on the use of equipment to make rescues easier and safer for the guard and the victim.
These are notes from the 2012 and 2017 lifeguard training manuals:
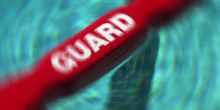
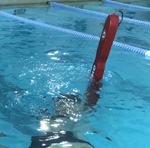
The rescue tube “is a 45- to 54- inch vinyl, foam-filled tube with an attached tow line and shoulder strap. A rescue tube is capable of keeping multiple victims afloat.
The rescue tube helps you and the victim stay afloat.
Keeps the victim’s mouth above water. This causes less anxiety and makes it easier for the victim to follow your directions.
Makes it easier to move the victim to safety.
Lessens the chance of the victim grabbing you during the rescue.”
NOTE that this is not the method for any victim you suspect of having a spinal injury. Also NOTE that this webpage is not complete training in how to perform this task.
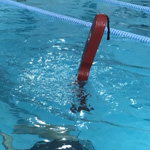
The rescue tube is quite buoyant. You can use its buoyancy to get even a heavy submerged victim to the surface. For example, imagine a pool patron had a heart attack or stroke and started to sink to the bottom of a pool. As you will practice many times in class, you were wearing the rescue tube strap over your shoulder as you guarded. You activate your emergency action plan, enter the pool and swim to the sinking victim. The buoyant tube stays at or near the surface and the line plays down as you swim down.
As you are doing this rescue, you will feel tension on the rescue tube strap increasing and decreasing as the tube bobs up and down in the air
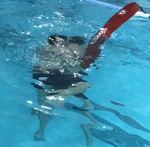
You will grab the victim under the victim’s arm and across the victim’s chest and hold firmly onto the victim’s opposite side.

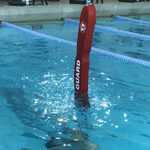
With your other arm, you reach for the now taut line coming down from the surface. You pull it down and pass the line to the hand holding around the victim. Immediately you feel the bouyancy of the tube pulling you and the victim up. You don’t even have to kick.
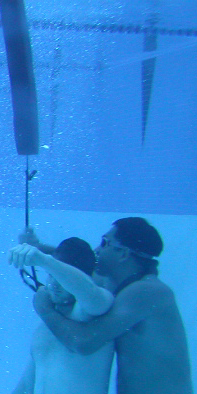
Usually with only one more grab of the line you have the rescue tube in reach to position the tube so it is placed between your chest and the victim’s back, below their shoulders.

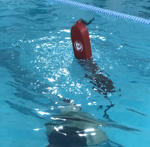
You are usually at the surface now and it requires only a little kicking as you lean back in the water to get the victim’s body horizontal (with their head back in an open airway position) and begin to move them to the side of the pool.
This is sooooo much easier than the old methods of lifeguarding before rescue tubes!
Once you have the victim at the surface, the next step is at: How to remove a victim from the pool
Lifeguard Training FAQs, has a description of the the prerequisite swim test with advice and tips for passing lifeguard training prerequisite swim tests and written exams. The same tricks for Red Cross training also for apply to YMCA, Ellis, USLA, Boy Scouts or Starguard tests The last person to finish the prerequisite test Fall quarter 2004 was a 115 pound woman. She ended up with the highest “A” in the class and earned all seven certifications.
These photos are of:
(left) A.R.C. lifeguard Donald Kainessie rescuing A.R.C. lifeguard (and lifeguard instructor) Duong Nguyen
(right) A.R.C. lifeguard and Water Safety Instructor (WSI is the Red Cross designation for certified swim instructor) Shahin Zonoobi rescuing A.R.C. lifeguard, WSI, and CPR/first aid instructor Tim Ryon.