Another tale from the Ultimate fixer-upper , a webpage for my students who are worried they might never be able to buy a house in Silicon Valley.
1) Retile the bathroom floor for experience. (Nov. 2000)
2) (Dec. 2001) Make a cabinet for all the things on shelves in the laundry room.
2) (revised) Clean the garage so there’s room to work in the garage on the carpentry project
3) (revised) Make a cabinet for all the things on shelves in the laundry room.
Oops, wait, lets save money and re-use the cabinet doors from that set of cabinets we’re using in the guest house for storage. (The ones your brother found ten years ago and asked if he could store them at our place until he bought the fixer-upper he wanted to remodel.) That means cleaning the old finish off first and it sure is wet weather, so the various coats of paint will take awhile to dry.
3) Revise the design of the new cabinets. We should put up some crown molding. Well, we’re off schedule now.
4) (estimate- Dec. 2001) Move the laundry appliances to the guest house.
4) Revised (Jan. 2002) Clean up stacks of junk in guest house (well, we call it a guest house but it’s actually only a building with a fairly new roof that we use as extra office space) so there’s room for the laundry. Put in a 220 outlet in the guest house and devise a connection to the drain line.
5) Move washer and dryer to guest house.
Okay, so the dryer vent hose turns out to have a couple of pounds of lint in it and a big crack. Clean out the vent hose and duct tape the crack ’cause there’s no time right now for yet another extra trip to a hardware store. Vent dryer in guest house thru the window that’s been broken since we bought the house. (How darned convenient!)
6) Feb. 2002 finished the new cabinets
7) Move accumulated junk off laundry room floor so we can get started on the wall.
Coming soon to a theater near you:
8) Open up wall between laundry room and bathroom to check pipes and put in an extra electrical plug as long as we are there. It will only slow things down a little. Hey, let’s put a sink in the laundry room to use while we’re tiling the kitchen, it will only be a little extra work to put faucets and a drain in there. (You might guess that did not happen.)
9) Tile area in front of kitchen sink first so the pattern of tiles looks best right in front of the sink.
HA! You though I was going to put in “redesign the tile pattern,” didn’t you. But we did that for the umpteenth time somewhere back during steps 2 and 3.
10) Tile laundry room
11) Move stove and fridge into laundry.
12) Tile area on other side of kitchen where the stove and fridge were.
13) Move the stove and fridge back into place.
14) Move the laundry appliances back
14) (revised) Move accumulated junk out of laundry room so we can put the appliances back.
15) Move the laundry appliances back
16) Finally make the wood threshold for the bathroom floor when we make the one for the kitchen.
a zillion chores and other projects later:
2003 started again at step #8
Open up wall between laundry room and bathroom to check pipes and put in an extra electrical plug as long as we are there.
Then we redid all the hot water pipes in the house.
a zillion chores and other projects later:
spring 2004 Went to see some model homes and redesigned the tile pattern as a result.
Dec. 25, 2004 move appliances out again. We scrapped the idea of moving the appliances within and between rooms to be less disrupted in our cooking, etc. It does seem that having the whole space open to work in will function better.
Laundry back and operating in guest house. Stove in garage, so we are cooking in the microwave and on a camping stove. This is an improvement over when we first bought the house and did not have a microwave.
Fridge in the breakfast room. We had to take off the doors to get it out of the kitchen. Will remember to put some kind of blanket over the freezer section and door when we try to get it back in as it took the two of us awhile to accomplish.
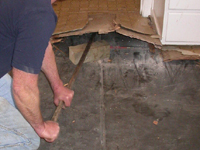
Dec. 26 started tearing up the kitchen floor linoleum
December 2004 and into January 2005
The floor tiling is taking longer than we imagined, even when we planned it to take awhile.
We wanted to do it in parts, so we can still walk through the kitchen/laundry room out the back
door. But each set of tiles has to set 24 hours before it can be walked on.
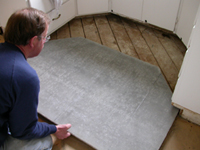
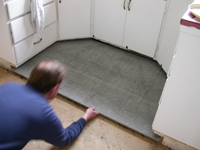
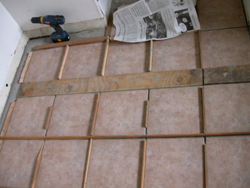
We started with rows of the big tiles (12″ x12″) , and added the stripes of littler ones (2″ by 2″,
two across) later. The color is mostly tan, with a little gray and vaguely pink. It looks better than it sounds and it might not show all the dirt we track in from the backyard.
We started with the area right next to the sink, so it could look even in relation to the cupboards.
We did without the sink for that two day period, but we were able to use it again sooner than we thought.
Our tiny kitchen has the advantage that we can use only one board per section of floor.
The tiny white store-bought spacers we used between tiles on the bathroom floor were a pain and we still found them all over the house for weeks after the job. So we made wood spacers this time and they worked faster.
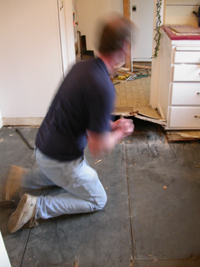
At first we tried putting big pieces of paper folded like tents on the parts we should not walk on, but that failed. So Alan cut up some strips of plywood and screwed them in at the spaces between the big tiles.
In the photo below you can see the spacers and our attempt at keeping ourselves from stepping on tiles we had just set.
Jan. 10, 2005
As I write this most of the kitchen is tiled and we are waiting for the grout to dry. Then we can put back the baseboards and bring the stove back in and can have an oven again!
Okay, well, yes, let’s get new baseboards made of Timbron so we won’t ever have to repaint.
December 13, 2005, yes, almost another year later, the laundry room tile is in and the washer and dryer are back in the house!
There’s more at the Ultimate fixer-upper.