Below is a transcript of the Red Cross video of how to swim freestyle, for my students to enhance their learning.
(“Front crawl” is an alternate name for freestyle.)
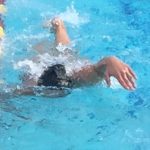
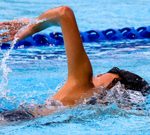
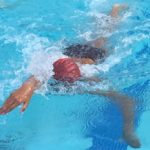
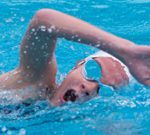
These are all examples of common mistakes with the freestyle stroke:
Many of my students have told me they could breathe to the side during their freestyle swimming, but it never felt right. Other students have not been able to breathe to the side yet at all.
I made a webpage with lots of photos that even students who know how to breathe to the side quite well have learned new things from, that can help them if they observe and give advice to a partner.
See: common errors in freestyle swimming
First, to be able to understand vocabulary about swim strokes, a transcript of the video section on stroke mechanics
“Stroke mechanics are the basic elements of each stroke–body position, breathing and timing, arm stroke and kick. The focus of stroke mechanics is on making the most of propulsive movements while maintaining efficient body position and good body alignment. There are several terms you should understand before we begin studying individual strokes.
Body roll relates to the body position. It is the rotation of the body around the mid line–an imaginary line that runs down the center of a swimmer’s body. This rotation is important in the front and back crawl.
The power phase is the part of a stroke where the arm or leg moves the body in the right direction. The power phase of the arm stroke has three parts–the catch, the mid-pull and the finish.
The pitch refers to the angle of the hands as they move through the water. A good swimmer can feel a change in pitch because the water flow over the hand is different whenever the angle of the hand changes.
The recovery is the part of the stroke where the arms and legs relax and return to their starting position. Some strokes may also have a glide–a part of the stroke when the body keeps moving without any effort from the swimmer.
No two swimmers perform a stroke exactly the same way. You may need to adjust part of a stroke because of individual differences in body type, strength or flexibility. Understanding the basic elements of each stroke is the key to becoming a better, more efficient swimmer.”
Next: the transcript of the Red Cross video of how to swim freestyle.
The front crawl is the fastest swimming stroke. Most of the propulsive movement of the front crawl comes from alternating arm strokes that drive forward on entry and then apply force backward during the underwater arm motion. Additional propulsion is supplied by a flutter kick.
Good body position is essential. The position of your head directly affects the rest of your body. Look toward the bottom of the pool or slightly forward keeping your neck in a neutral position as if standing up straight. The water line should be at about the middle of the top of your head. Keep your head still unless you are turning it to breathe. Proper body roll helps you swim efficiently by helping you maintain your body position, giving a rhythm to your stroke and making breathing easier. For the front crawl, your shoulders and torso rotate to the side about thirty to forty degrees from the surface of the water. Your legs also rotate to the side but to a lesser degree.
The three movements that produce good body roll are: a good forward arm extension; a strong mid-pull; and a forceful kick to help the hips rotate with the rest of the body.
Rhythmic breathing is essential for efficient swimming. Whether you breathe on every arm cycle or you alternate sides breathing every one and a half cycles, proper timing and rotation make it easy to turn your head to the side without disrupting the flow of the stroke. Begin turning your head toward your recovery arm as it exits the water. Turn your head just enough for your mouth to clear the water but not so far that your body twists. Keep the water line at the top of your head and one ear in the water–this creates a trough in the water directly in front of your mouth so you don’t have to raise your head to take a breath. Inhale when your body rotation is at its maximum and your recovering elbow is high. After inhaling, quickly return your face to the water before your recovering arm reenters the water. Under water, exhale slowly and completely from your nose and mouth before you turn to take your next breath.
The arm stroke begins as your hand enters the water at an angle, fingers first and palm pitched slightly outward followed by your bent elbow. The point where your hand enters the water is about three fourths as far as you can reach with your arm fully extended. As your fingers enter the water, extend your arm forward in a smooth fluid motion. Good extension helps your body rotation. The path that your arm follows during the power phase for the front crawl looks like this–the catch, the mid-pull and the finish. During the power phase, use your entire arm to push water backward and propel your body forward. Your hand gains speed from the catch to the finish–the fastest part of the stroke.
The catch is the part of a stroke when your hand first catches the water and begins to move your body forward. The catch begins when your arm is fully extended. Bend your elbow so your palm and forearm face toward your feet and press backward, finger tips pointing down. Pointing your finger tips down causes your elbow and hand to naturally move slightly outside your shoulder. Your body starts to rotate along the mid-line as soon as the catch is established. During the mid-pull, press your palm and forearm directly backward so your hand follows a straight path along the side of your body. Keep your elbow slightly higher than your hand and wider than your shoulder throughout the pull. Don’t let your hand cross the mid line of your body. During the finish, keep your palm pressing toward your feet and your finger tips pointed toward the bottom for as long as possible. As your elbow bends toward the surface your hand moves upward.
The recovery puts your hand back in position to stroke again. Lift your elbow so it comes out of the water first. Keep your elbow high throughout the recovery, but not so high it causes stress on your shoulder. Swing your arm around to the side in a relaxed motion, keeping your hand wider than your elbow. As your hand passes your shoulder, let it lead the rest of your arm and drive your hand forward to the entry point. Now watch the front crawl arm stroke in its entirety. Notice how the body rotates throughout the stroke, reaching maximum body rotation during each forward extension just before the catch.
The flutter kick is used in the front crawl. The most powerful part of this kick is the downward motion or down beat of the foot and leg. The motion starts at the hip. Your thigh starts moving down even while your calf and foot are still moving up. Your knee is slightly bent through most of the down beat until you quickly straighten your leg and snap your foot down as though you’re kicking a ball, creating a burst of power. Before you start the up beat of the kick, extend your legs so that there is little or no bend in the knee. Keep your leg straight and raise it up until your heel just breaks the surface.
Swimmers use different cadences or beats for their kick. The cadence is the number of kicks in an arm cycle–that is the time it takes for one hand to enter the water, begin the pull and then return to that position. Cadences for a front crawl are typically either a six-beat kick or a two-beat kick. Most swimmers use a six beat kick for shorter distances and a two-beat kick for longer distances.
Let’s take a look at all of the elements of the front crawl combined. Notice how careful coordination of all body motions create smooth and efficient movement through the water.”
The Red Cross has notes about how most people progress as they learn freestyle
Body position: Body horizontal to 15 degrees from surface; performs body roll; occasional side-to-side motion of trunk and legs acceptable
Then
Body is nearly horizontal to the surface in a streamlined position; body roll is a fluid motion—head, trunk and legs are aligned
Kick: Continuous kicking that starts from the hips; ankles and knees extended but not rigid; feet remain below the surface—moderate splash acceptable
Then:
Continuous kicking that starts from the hips and propels swimmer forward using a 2- to 6-beat kick; heels just break the surface
Arms: Above-water recovery with arm bent at elbow— arm straight at elbow acceptable; hands enter above the level of the head, fingertips first in front of the shoulder; arm extends fully after entry; arm bent at elbow during power phase; power phase finishes beyond hip
then:
Above-water recovery with arm bent at elbow; arm relaxed as hand moves toward the head; arm extends fully in coordination with body roll; elbow and hand move just outside the shoulders as the arm travels straight backward; palm presses toward feet until arm reaches full extension during finish
Breathing and Timing: Face in water; breathing to the side; exhales underwater on each breath; arms alternate— slight hesitation during breathing acceptable
then:
Exhales underwater before the next breath during the power phase; head remains in line of the body— minimal head movement; alternate side breathing preferred
You can watch the video at the Red Cross swim teacher certification page. This video has more details than you can absorb in one viewing. My students who have seen it during classes multiple quarters in a row say they noticed something new each time.
To find the video go to
https://www.redcrosslearningcenter.org/s/candidate-water-safety
scroll down to the Videos section and click on Swimming and Diving Skills: Freestyle
(it runs just under six minutes).
If you use Firefox as your browser, you might get an error message: “No video with supported format and MIME type found.”
Google Chrome and Microsoft Edge work as browsers.
If you would like to do some reading about swimming strokes, or swimming in general,
try the American Red Cross Swimming and Water Safety Manual.
Its public libraries number is 797.
This is the text for the Red Cross swimming teacher certification Water Safety Instructor.
A description of freestyle starts on page 116, backstroke on page 121, breaststroke on page 124, butterfly on page 128, elementary backstroke on page 133 and sidestroke on page 137.
It might be still downloadable for free. Go to
https://www.redcrosslearningcenter.org/s/candidate-water-safety
scroll down to Participant Materials and click on and open Swimming and Water Safety Manual.
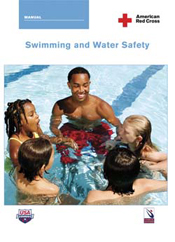

(The American Red Cross Swimming and Water Safety Manual had no index, so I wrote one:
Swimming and Water Safety 2009 index).
The Cooper 12 minute swim test, which we do in my higher level swim classes, is on page 192, where it says “The 12-minute swimming test, devised by Kenneth Cooper, M.D., is an easy, inexpensive way for men and women of all ages to test their aerobic capacity (oxygen consumption) and to chart their fitness program.”
How can I tell if I’m a good swimmer? has more tests
Or should we call that page, how can I tell if I’m a fast swimmer?
See also: common errors in freestyle swimming
see also: Backstroke swim video transcript
Butterfly swim video transcript

