HIKING SECRETS and etiquette
on this page include hiking in the heat, preventing and/or dealing with blisters, logistics of hiking, a day hike gear list, Half Dome hiking advice, winter hiking and the answer to the question: When is the best time of day to cross a mountain stream?
_______________________________________________
Plan ahead for a long hike. Are your boot laces about worn out? That small tear in the rain jacket could get bigger and give you trouble. When was the last time you trimmed your toenails? You really ought to see the dentist about that toothache.
Unless your pack comes with special instructions, pack the heaviest things lowest in your pack, so your hip belt carries the weight instead of your neck. You can adjust how your pack carries by hiking some with your hands on top of the pack frame (also good if your hands swell a little from altitude, exercise and gravity).
Drinking lots of water is the biggest secret many people don’t know. So, drink more water than you’re used to, regularly throughout the day (about 1/4 liter per 1/4 hour for maximum efficiency, maybe with a diluted sports drink).
When you get thirsty you’re already 1.5 liters low on water, your endurance is reduced 20 per cent, and your maximum oxygen uptake (a measure of heart and lung efficiency) can drop 10 percent. All this can happen after less than one hour of hiking. Drink enough water to keep your urine light-colored and enough that you never get thirsty.
Don’t drink water directly from streams or lakes. You must purify it (we always use pumps instead of tablets or trying to take the time to boil water). Please learn how to use one in advance.
You will need as much as a gallon for a long all day hike. If there is no where to get more water as you drink it, you will need to carry the whole amount.
HIKING WHEN IT’S HOT
The CDC (Centers for Disease Control and Prevention)says:
“What is the best clothing for hot weather or a heat wave?
Choose lightweight, light-colored, loose-fitting clothing. In the hot sun, a wide-brimmed hat will provide shade and keep the head cool.
Should I take salt tablets during hot weather?
Do not take salt tablets unless directed by your doctor. Heavy sweating removes salt and minerals from the body. These are necessary for your body and must be replaced. The easiest and safest way to do this is through your diet. Drink fruit juice or a sports beverage when you exercise or work in the heat.”
Salt tablets can irritate your stomach and cause nausea and/or vomiting)–but a few salty snacks are a good idea to replenish salt after sweating. Some people have needed to be rescued when they failed to include salty snacks in their diet, hiked a lot, got very hot and sweated a lot (sweating is your body’s number one way to to cool down), then could no longer sweat because they did not have enough salt to produce sweat, and were unable to even walk, and were starting to die from the heat. Lack of salty foods can be as dangerous as dehydration. “Easily digestible salty snacks to replenish what you lose through sweat” are recommended.
SO, Drink more water AND have salty snacks. Peanuts are a good protein and good source of calories.
Some people have needed to be rescued when they failed to include salty snacks in their diet, hiked a lot, got very hot and sweated a lot (sweating is your body’s number one way to to cool down), then could no longer sweat because they did not have enough salt to produce sweat, and were unable to even walk, and were starting to die from the heat.
Lack of salty foods can be as dangerous as dehydration. The park service often warns hikers:
“Avoid becoming dehydrated or experiencing heat exhaustion. Drink plenty and drink often; pace yourself; rest in the shade; eat salty snacks.”
Heat can affect you and tire you quickly, and heat exhaustion can very quickly become life-threatening heat stroke.
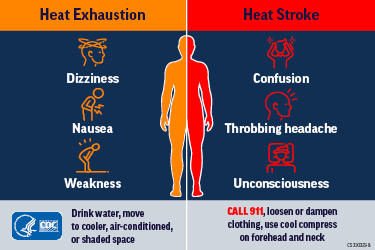
and see Heat Illnesses
Yosemite Climbing Ranger John Dill wrote
“No Yosemite climber has died from heat, but a half-dozen parties have come close. Too exhausted to move, they survived only because death by drying-up is a relatively slow process, allowing rescuers time to get there.”
Light colors reflect sun–dark gets hotter
Short sleeves or tank tops are cooler–but if you wear them use lots of a potent sunscreen (SPF 5 is a joke)
Cotton or open-weave synthetics are coolest. Cotton will retain your sweat or water you soak it in to cool you (that’s why you don’t want cotton at night or in the winter.) You can buy a lightweight cotton sun-proof long sleeve shirt.
Wear a hat with wide brim all the way around! You can soak some hats in water.
For winter, Yosemite National Park says: “Carry and eat high-energy food.
Your body burns a lot of calories keeping you warm, so make sure you don’t run out of fuel. . .
Drink plenty of water (and carry extra).
Dry winter air means you need more water to stay hydrated. Don’t forget to drink because it’s cold out.”
and see first aid for cold related illnesses and injuries.
ON THE HIKE
Get up early enough to get moving early, drink extra water and have plenty of time. Warm up and stretch a little before your hike. Put the sunscreen on before you start having fun and forget.
You could injure yourself and end the hike at the trailhead if you swing that heavy pack up on to your shoulders too quickly.
Avoid following the person in front of you too closely so you won’t collide with them if they stop suddenly or either of you slips, and so the branch that caught on their pack won’t slap you in the face.
Be careful of your huge backpack (or even a large daypack) on a tight trail. If you turn around too quickly you can knock someone behind you off the trail.
Walk at a regular but slower pace until you get your ‘second wind’; also use a slower pace uphill when you need to. Don’t worry about the people without packs scurrying past you.
With a pack, at a higher altitude (less oxygen) than you’re used to, you may need to take uphill ‘staircase’ parts of hills very slowly. One step, then a couple of deep breaths. One more step and more breaths. It is much wiser to hold yourself to a snail’s pace, get enough oxygen and keep going than to go too fast, then stop too long.
Walk at a pace that allows you to talk and you will be getting enough oxygen for your legs to function the best. Grand Canyon National Park explains it this way:
“Avoid Huffing and Puffing
IF YOU CAN TALK WHILE YOU ARE WALKING, YOU ARE WALKING THE PERFECT SPEED.
When you huff and puff your body is not getting enough oxygen. Walking at a pace that allows you to be able to walk and talk means that your legs and your body are getting the oxygen needed to function efficiently.
When your body generates fewer metabolic waste products, you enjoy your hike more and you feel better at the end. At times it may seem like you are walking too slow, but at an aerobic pace (sometimes even baby-sized steps when the trail is steep) your energy reserves will last longer. You will also feel much better that night and the next day.”
Take short ‘breathers’ to drink water, look at scenery, munch a little, check the way the trail looks behind you at a trail crossing so you will recognize it on the way out. These should be short stops. Don’t take your pack all the way off, just lean against a tree or boulder to take weight off your shoulders. Don’t stop long enough for your legs to get stiff. Grand Canyon National Park explains it this way:
“Take a Break
TAKE A TEN MINUTE BREAK AT LEAST ONCE EVERY HOUR.
A break of ten minutes helps remove the metabolic waste products that build up in your legs while hiking. Take a break at least every hour. Sit down and prop your legs up. Eat some food, drink some fluids, and take this time to enjoy and appreciate the view. These efficient breaks can recharge your batteries. In the long run, breaks will not slow you down.”
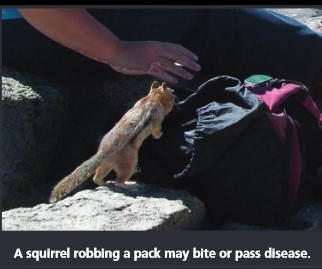
Watch out, ground squirrels can get into the pack you set on the ground in seconds. Other people have fed them and they become aggressive.
Make a mandatory (this means everybody) stop in the first half hour to check for ‘hot spots’ on feet where moleskin is needed, tighten or loosen bootlaces, pull up bunched up socks, adjust packs, take off or add layers of clothes, stretch thoroughly, and drink more water, even if it’s not warm yet, start snacking before you get hungry.
If the moleskin and proper fitting boots don’t always work, don’t pop or drain the blister, it is there to protect you and you can get an infection. Pack it proper bandaging like Spenco Second Skin.
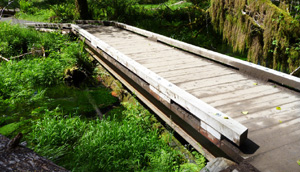
When you’re about to do a long downhill, tighten your bootlaces so your feet won’t slip and create blisters on the ends of your toes. Go slower than gravity would push you to. It’s easier on your body and you’re less dangerous to others. On slippery downhill surfaces, like wet leaves, mossy rocks, wet rock slopes, sandy granite steps or wet wooden bridges/steps, use shorter steps and really plant your feet so your whole boot contacts the surface. The compacted section of snow is slipperier than the still fluffy snow more at the side. Your boots do have enough tread left on them, correct?
Cross-country ski poles, trekking poles or hiking sticks really can help lessen the load during downhills on your knees and ankles and give you better balance.
Don’t step on top of anything you can step over.
Don’t step over anything high you can walk around.
Before stepping fully on a rock that might slip, test it partially.
When going downhill, give uphill hikers the right of way so they don’t have to break their pace.
When you need to take a breather, especially on narrow sections of trail like parts of the Mist Trail in Yosemite, move aside so others can pass. When people get momentum moving uphill it can be hard to regain if they have to stop every time the person in front of them wants to stop.
Ask permission to pass instead of elbowing past.
Bears on the trail? From the Yosemite Daily report Sept. 20, 2021: “In Yosemite Valley, an elevated number of reports has been received of bears on the Mist Trail. One bear even used the railed steps to come down from the top of Vernal Falls during the middle of the day. If you run into bears on trails, give the animal plenty of space and protect your food—do not abandon it. Given the many heavily populated, narrow, switchbacking trails in the park – it is easy for a bear to quickly become surrounded with no exit if it is not given proper space. Always try to maintain 50 yards from a bear, even if that means backtracking and waiting for the bear to pass. If the bear approaches you (closer than 50 yards) yell as loudly as possible and try to scare the bear off…”
When a pack train or people on horses need to go by, move downhill. Remain completely quiet and stand perfectly still. (Or follow the directions of the wrangler.) Do not return to the trail until the last mule is at least 50 feet (15 meters) past your position.
Bicyclists must yield to horse (mule, llama) and foot traffic and on most backcountry trails in national parks (all of the trails in Yosemite), mountain biking is prohibited. Where cycling is okay, for example on a paved pathway in Yosemite valley shared by bikes and pedestrians, control your speed and let others know before you pass. You might say something like ‘cyclist approaching, passing on your left’ as you approach them.
Where bikes are allowed foot traffic should not walk side by side on narrow trails when bike traffic is approaching and make the cyclist stop. Move over into single file and share the trail.
https://ohv.parks.ca.gov/pages/1140/files/sharing%20our%20trails%20guide.pdf has details advice on sharing trails.
Where possible, take breaks away from trails and other visitors, on an already worn out or rocky space. On some trails you MUST remain on the trail at all times, such as the meadows in Mount Rainier at Paradise, Sunrise and Tipsoo Lake, even for a lunch stop or to take a picture.
Stay on the trail. Don’t cause erosion by cutting across switchbacks (trails with lots of U-turns on steep hills).
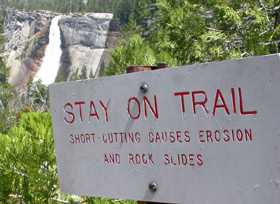
If you decide to go off-trail, please be prepared that you can step between rocks and unknowingly step near a rattlesnake, or “crevices can hide scorpions, spiders, and yellow jacket nests”. https://www.nps.gov/yose/blogs/Nevada-Fall-Rattlesnake-Bite.htm
“Choosing to leave the trail and scramble in boulders below waterfalls can have a costly outcome. Is getting closer really worth the risk?”
https://www.facebook.com/YosemiteNPS/videos/462862757639618/
Remember–the plant you step on is dead, or if it’s not it “may take 300-500 years to recover once trampled or destroyed” (according to Grand Teton Nat’l Park rangers). If you must cross meadows, spread out your group. Don’t stay in single file unless there’s an existing maintained trail. If there is a trail, stay on it even if it’s muddy or sandy and difficult to walk on, don’t erode another trail scar. Hey, no baseball, frisbee, kite flying, soccer or other trampling of meadows!
Leave no trace
Sliding down snowbanks or sections of scree (like lots of loose, large gravel) is dangerous with a pack on, and not real smart in general. Some people recommend running, sliding and almost skiing down scree slopes. But consider how far you are from help, how difficult it will be to try to hike out with even minor injuries and how much a non-functioning ankle will spoil the rest of your trip. Also consider that you might not be able to stop before that huge boulder and you could start rocks sliding into the path of or on to others. People have died or had serious injuries trying this.
Any hike to the top of a mountain must start early to avoid afternoon thunderstorms. No matter how close you are to a high destination, you must turn away if lightning is seen or thunder heard.
Thunderstorm and lightning safety has more.
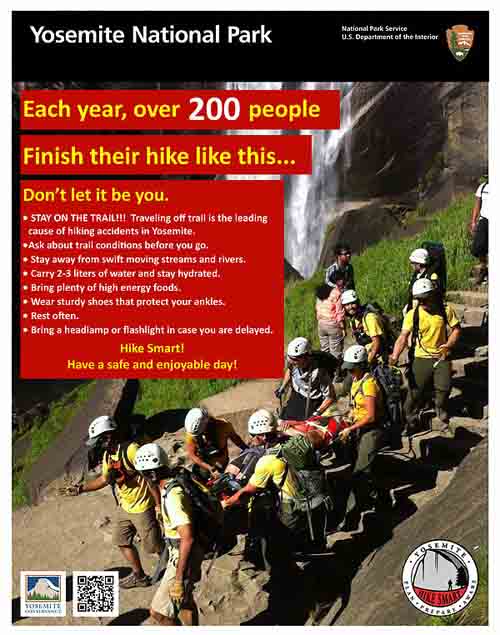
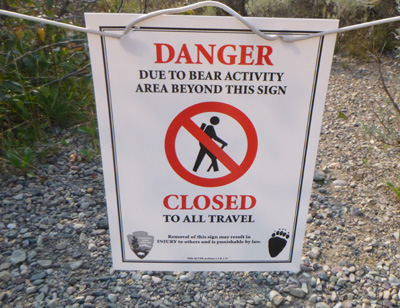
It would be wise to ask at a Visitor Center about trail conditions before your hike, but a rockfall could close part of the trail and they would not know about it. In cold weather the trail may also have icy conditions that are not reported. You take your own risks. IF there are any trail closure signs, please follow them. When Yosemite trail crews have closed a trail, (including sometimes overnight, but often not on weekends) “there is a $280 fine for entering a closed construction zone.” The trail use might not be safe or they might even be performing blasting operations, so don’t ignore trail closure signs / notices, or go through closed gates.Yosemite trail conditions: https://www.nps.gov/yose/planyourvisit/conditions.htm#trails
You could go to an area / trailhead you have often visited and find a warning you must heed:
and see Winter Hiking Advice further down this page
__________________________________________
If you each take a photo of all the hikers in your group on your cell phone just before you start the hike, this can be used to document what each person was wearing, maybe quite helpful if someone gets lost.
__________________________________________
You will find that with a large group, some people are not as fast of hikers as others, and the fastest do not always keep track of the rest. Or someone stops to take pictures and becomes separated unintentionally or . . . The NPS gave this caution: “The Yosemite Emergency Communications Center frequently receives calls from separated parties, which usually result when groups did not make a plan for where and when to meet in the event they became separated. Fortunately, many of these incidents self-resolve; however, a few become search and rescue incidents when the separated parties fail to reunite. When hiking in a group, be sure to account for all members of the group while hiking and develop a plan with group members before separating from the group.
__________________________________________
Grand Canyon National Park (where many people start a hike downhill in the cool hours of the morning, unprepared for the heat in the afternoon on the steep trail back up) has safety notes, hiking advice
and these reminders about Trail Courtesy Practices
Uphill hikers have the right-if-way. Why? Uphill travelers are often fatigued and working hard to maintain their balance and pace.
• If you’re descending, slow down and yield to uphill travelers.
• Some uphill travelers may see you and decide to stop or step off the trail — it’s their call.
To pass someone in front of you slow down and let them know you want to pass. Why? Slowing down and asking to pass maintains a friendly atmosphere and ensures safe passage.
• Communicate in a clear quiet tone. Do not yell.
• Do not expect slower travelers to move out of your way.
• Keep in mind, some hikers may not speak English and may not understand you.
The Mountaineers Club of Washington climbing code tells us to:
Carry all the necessary clothing, food and equipment at all times.
Necessary means a full day pack, or perhaps a more comfortable partly full backpack, with enough stuff on a hike to stay overnight on the trail, maybe not comfortably, but survivably.
If you don’t carry your raingear on a hike and it starts to rain, your clothes can get soaked through. In the cold temperatures of the mountains, winter or not, you could die from exposure.
____rain gear (hooded jacket and pants, not a poncho)
![]() Yes, it could be bright yellow, but you won’t be the only one. Be sure you get a set with a hood, some rain jackets do not have one.
Yes, it could be bright yellow, but you won’t be the only one. Be sure you get a set with a hood, some rain jackets do not have one.
If you can sew, you can Improve your inexpensive rain gear and turn a less expensive set into one with more features.
____knit hat and gloves on a winter hike,
_______ hat for sun with a brim to shade your eyes and a warm hat in cold weather,
_____two or three lunches per person (not just a couple of lunch bars) … sandwiches, fruit and some salty snacks such as salted peanuts to replace the salt you lose when you sweat (or you risk getting quite ill). GORP and hiking snacks
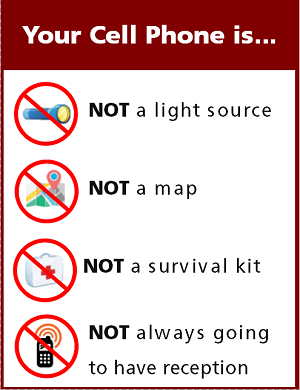
_____headlamp and/or flashlight (electric torch), spare batteries/bulbs (you can’t count on the flashlight function of your cell phone lasting long enough or being bright enough)
____water bottle(s) for multiple liters of water per person
_____layers of warm clothes
____sunglasses
______ high SPF, waterproof, sweatproof sunscreen (put a layer on in the morning so you won’t forget to use it, and bring some extra), SPF (sun protection factor) 5 is a joke, as is 15 for people out playing by/in the water or at high altitude where they get more sun. At altitude for advice.
_____ insect repellent
_____chapstick, dry skin lotion
_____personal first aid kit
____whistle
____ personal prescriptions
Yosemite Search and Rescue recommends: “Recreating with medical conditions: Medical conditions should not prevent recreationists from enjoying Yosemite’s vast wilderness; however, proper management of medical conditions is essential for a successful wilderness experience. Whether hiking in a party of two or ten, it is important for fellow hiking companions to be aware of medical conditions in the group and proper treatment and management of medical conditions. Recreationists who are prescribed medication should carry the medication (plus a few extra doses) in a personal pack so that they don’t miss a dose if an outdoor outing goes awry or longer than anticipated.”
and add:
____well broken-in hiking boots or cross-training shoes with at least some ankle support instead of sneakers
_____ Two pairs of socks, one thin, one thicker (not cotton!!) are more comfortable than one in boots
_______ long sleeved sunproof shirt
___jackknife or multi-tool
___toilet paper, trowel and knowledge of how to use them
___ quart sized plastic bag for a litter bag, or even better a double layer of bags (double plastic bag that’s big enough to hold your own trash, and stuff you notice someone else left on the trail).
When you are about to leave, check your lunch stop for microtrash —look for bandages, twist ties, fruit peels, bits of wrappers, stray potato chips, torn corners of candy bar wrappers and power bars, plastic bottle caps, bits of G.O.R.P. etc. and maybe even pick up what others have left behind.
____Personal I.D.s such as driver’s license, medical insurance card, credit card, power of attorney for health care card, auto assn. card, spare car keys
____lighter, waterproof matches (or matches in a waterproof container)
____ firestarter
____ water purifier pump (plus chemical means should the pump die)
____compass
____ map (the club often has extra maps for our dayhikes)
a map and map reading skills are a necessity, a GPS unit is not. GPS is not infallible

____croakies or other eyewear retainers to hold your sunglasses on while you peer over the top of a view point
____ spare socks
____spare prescription glasses or contacts and fluid
____ moleskin (if you know you need it to prevent blisters, put it on before the hike)
____Spenco 2nd Skin
____camera, _____more film than you think you’ll need
____lenses ___ tripod
____small notepad and pencil ____minibinoculars
____ duct tape wrapped around one person’s water bottle to repair various things
____ a couple of large plastic leaf bags for various emergency uses, or just to make a rain poncho for another hiker
____ If you will be swimming where you are going you probably want to either wear the swimsuit under or remember to pack it, as well as a lightweight towel (we carry single-fold cloth diapers or springboard divers mini-towels for this). Rubber sandals with tread on the bottom are useful for wading. Don’t bring the slip-on flip-flop type, they should have a velcroed strap around the ankle and back of the heel.
_____ We use hiking poles (originally we got along fine with our cross-country ski poles) especially on long downhills, to protect our knees and transfer some of the load from our legs to our upper body. They also give extra stability crossing streams. Ones that telescope or unscrew into sections will more easily fit in airplane carry-ons or checked luggage. Shop around, you don’t have to pay $80 for these.
______spare batteries and bulb for the flashlight,
_____and on our winter trips, a chemical handwarmer packet.
(If you bring a cell phone or family band radio don’t leave your brains behind and take extra risks).
___________________________________
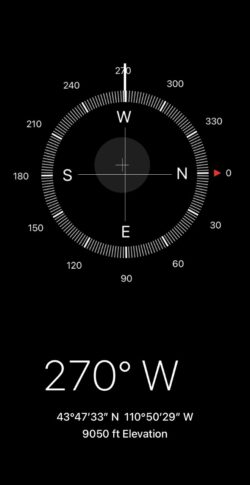
Find a compass, altitude, latitude and longitude on your cell phone
___________________________________
You won’t be able to fit all this in a tiny day pack. A real, ____full-sized backpack would be much wiser
AND then you can fit____ enough water (even 2, 3 or 4 liters each)
for that long hike. Hiking dehydrated is a miserable experience.
___________________________________________________
____________________________
_______________________________________________________
A few clues about distances :
about eight miles away the shapes of prominent trees and buildings become distinguishable
about 2 miles away you can see individual windows in a building
about a mile away a person looks like a moving dot without limbs
about 400 yards away (a little under a quarter of a mile) you can make out a person’s legs or a kayaker’s arms
about 250 to 300 yards away faces are discernible (but not recognizable)
___________________________________________
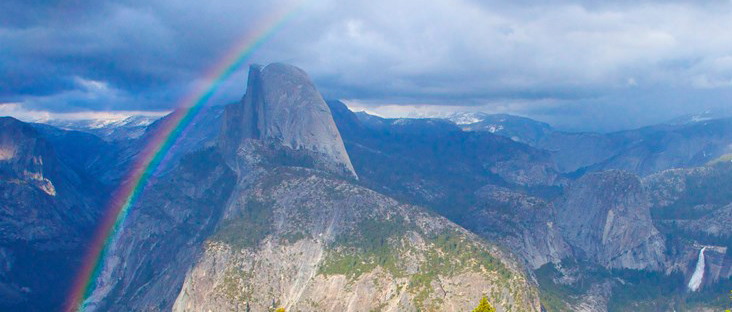
places to take photos of Half Dome in Yosemite National Park (with maps and some trail descriptions)
places to take photos of Yosemite Falls in Yosemite National Park (with maps and some trail descriptions)
locations to photograph Bridalveil Fall in Yosemite National Park (with maps and some trail descriptions)
places to take pictures of El Capitan in Yosemite National Park (with maps and some trail descriptions)
locations to photograph Staircase Fall in Yosemite National Park (with maps and some trail descriptions)
________________________________________________
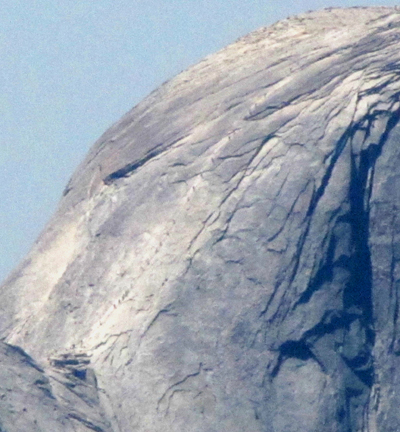
Photo below of a long line of people on the Half Dome cables taken with a telephoto lens from Olmstead Point near Tuolumne Meadows:
There is info, advice, (with photos and maps) about the hike to the top of Half Dome here.
Including
The two choices of trails most people use for the start of the hike, one of which can be a half hour faster on your way back down,
Common mistakes people make that you can skip doing,
Logistics about the time it takes, including that it can take a minimum ONE hour to get from the base of the subdome to the top of Half Dome.
Logistics of the cables use,
A great Yosemite park video to watch
Dates the cables have gone up and come down, back to 2011 (more snow pack some years)
Logistics of getting a permit (well in advance or very near the date you want to go), including the most popular days.and the daily Half Dome permits lottery success rates,
Why there are permits required,
Where to camp along the hike to Half Dome. (Camping is not permitted on top of Half Dome.)
A cautionary tale of: “The salesperson advised the subject not to wear his new boots on his upcoming Half Dome hike, since new boots that haven’t been broken in on shorter hikes often cause hot spots, blisters, and soreness on a long, strenuous hike like the Half Dome hike. Even so, the subject chose to wear his new boots. . . .
Which Yosemite valley campsites are the best for a short walk to the trailhead at Happy Isles or a short walk back after a Half Dome hike that took a bit longer than you expected and ended after the free shuttle buses are running,
And much more, again, here.
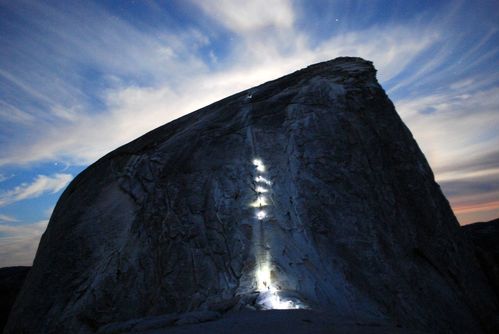
Just before sunrise, people with headlamps going up the cables:
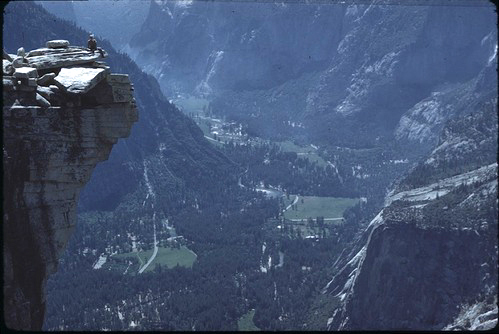
NPS photo of the view from the top of Half Dome down to Yosemite valley: (the man at the left is at the top edge, the “lip” of Half Dome)
___________________________________________
____________________________
________________________________________________
WINTER HIKING ADVICE
Park service advice:
“Following footprints in the snow or rock cairns is risky; they may belong to someone else—who also got lost.
Always pay attention to your return route and always be able to return from the way you came.”
“Plan your trip sensibly anytime you go out, keeping in the mind the experience level and conditioning of the weakest member of your group. Don’t separate from other members! Winter backcountry travel is almost always tricker than summer–conditions are unpredictable and variable, trails are slippery or hidden, visibility can be poor, and landmarks look very different under snow. New hazards such as falling rock or ice, snow bridges, or hollow spots under the snow pack can cause problems. Remember there is less travel time due to shorter days and more obstacles to speedy movement than in summer. Make sure someone knows where you are going and when you are due back.”
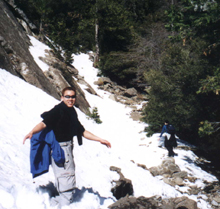
“The Wilderness Safety Action Team would like to remind you that when you work or play outside in the winter, remember that the weather is often unpredictable. If you are going out for the day, check the forecast, but be prepared for both ends of the weather spectrum each time you go out. Carry sunglasses, sunscreen and a hat for shade particularly if there is snow on the ground, but also carry storm gear and warm clothing. You lose much of your body’s heat from your head, so a warm hat is a necessity. Remember you need to eat and drink more to prepare yourself for cold weather activities–you need a gallon of fluids a day during strenuous winter activity. Creeks will be frozen, so “tank up” by drinking as much as you can before leaving and carry a couple of quarts of water for a full days outing.
Be prepared to spend an unexpected night out when traveling in the wilderness. If you get lost, or must bivouac, stay put and stay dry. Carry a lighter to build a fire–lower tree branches are often dead and dry. Look for pitch on tree trunks for fire starter. Boughs can be used for a platform in an emergency, and you can insulate yourself from the wind and snow by huddling together and sitting on packs or ensolite pads. A shelter can be made by digging a trench in the snow. Three blasts on a whistle, repeated often, will help searchers find you. Stomp out a big “X” in the snow to help the helicopter find you if things go that far.
This information is to help you stay safe by providing easy ways to stay out of trouble. Proper preparation and thought can prevent everything from unpleasant experiences to rescues, and allow you to spend your time enjoying the great outdoors comfortably and safely. (L. Boyers) ”
Snow camp weather, hike safety and first aid considerations
___________________________________________
____________________________
________________________________________________
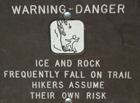
Here are rockfall safety tips from the Wilderness Safety Action Team.
. . . This text is from the official wording on the rock fall closures posted at the trail barricades, but applies to all of us.
ROCKFALL POTENTIAL IN THE PARK
Rocks and/or ice can fall at any time. While hiking trails, avoid lingering near talus or steeper slopes, particularly in winter. If you observe a rockfall in the area, call 911 or 209/379-1992 with information
on the time, location, and duration of the event.
BE RESPONSIBLE—BE SAFE
Rockfalls are a dynamic—and dramatic—natural process. But it is impossible for the park to monitor for every potential rockfall. In Yosemite, and in any natural area, it is up to visitors and employees alike to be aware of their surroundings and enjoy the park safely.
Rockfalls are dangerous and can cause injury or death. Use caution when entering any area where rockfall activity may occur, such as Valley walls, climbing areas, or talus slopes.
LEARN MORE
Winter is one of the most active periods for rockfall activity in Yosemite National Park. As temperatures fall in the evening and warm up during the day, cracks in the granite can widen, eventually causing rocks to separate
and fall.
To learn more about rockfalls and geology in Yosemite National Park, stop by any visitor center for an information sheet or visit online at www.nps.gov/yose. (L.Boyers)
see also: Yosemite rockfalls 2008 to the most recent report and safety tips for hikers
___________________________________________
____________________________
________________________________________________
From Sierra Nature Notes, Volume 4, June 2004
When is the best time to cross a mountain stream?
Understanding daily variations in streamflow
Jessica Lundquist, Soon-to-be PhD
Hydroclimatology Group, Scripps Institution of Oceanography
Jessica starts by quoting from an “Issue of Backpacker magazine… I spend my summers doing river research in Yosemite National Park, and for once, something had appeared in my mailbox that actually looked useful. I quickly flipped to a page titled ‘Become a stronger, smarter hiker’ and looked at a ‘Quick Tip’ highlighted in a black box. “The best time to cross a stream is in the morning, when the flow is lowest,” the tip read. “During the day, snowmelt can dramatically swell a stream. So if it’s late in the day, consider camping streamside for the night and crossing in the morning.”
Sounds reasonable, but how often is this good advice?”
She researched the issue and came up with the following summation:
“Jessica’s guidelines for stream crossing times in Yosemite: After showing more science and complexity than you may have wanted, the following are my rules of thumb for the times of peak and minimum daily streamflow, depending on where and when you are in the park (Table 1):
Table 1
Size of Stream Small (like Rafferty or Gaylor Creek)
Early spring melt (April and May) Max flow: 9-11 pm, Min flow: noon
Peak melt (early June) Max: 5-6 pm, Min: 8-10 am
Late-season melt (mid/late summer) Max: 7-9 pm, Min: 9-12 am
Size of Stream Medium (like Lyell Fork of Tuolumne)
Early spring melt (April and May) Max flow: 8-10 pm, Min flow: 10-12 am
Peak melt (early June) Max: 8-10 pm, Min: near noon
Late-season melt (mid/late summer) Max: 10 pm – 3 am, Min: noon – 4 pm
Size of Stream Large (like Merced at Happy Isles or Tuolumne at Hetch Hetchy)
Early spring melt (April and May) Max flow: near midnight, Min flow: near 4 pm
Peak melt (early June) Max: still near midnight or slightly later, Min: noon-3 pm
Late-season melt (mid/late summer) Max: morning, shifting as late as 10 am, Min: 3pm-midnight
In summary, it’s not always a good idea to set up camp solely for the purpose of waiting for better stream crossing conditions in the morning. This generally works near small streams in the summer, but not if you’re some distance from the snowline. However, setting up camp near a stream for several days could be a fun experiment. Watch the water rise and fall and learn what it tells you about the water’s journey from the top of the snowpack to the spot where you stand.”
___________________________________________
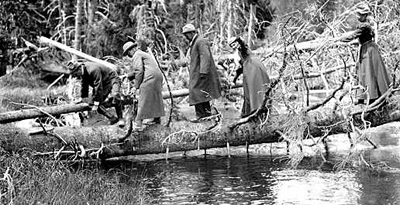
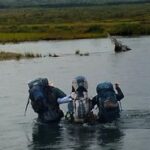
The best place to cross a creek or river is on the bridge built for this endeavor.
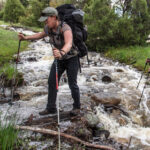
Crossing streams safely includes advice from Mount Rainier National Park, Yellowstone National Park, Great Smoky Mountains, and Yosemite National Park
Teton County (Wyoming) Search and rescue would like you to know:
“Do not stand in moving water, even if shallow. If your foot gets trapped in the rocks, the current will push you over, wedging you foot tighter, and pushing your head underwater. You will drown. Others have drowned in 2 feet of water this way.”
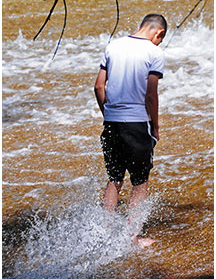
Water moving over granite can be moving much faster than you realize and the rock slicker than you think. Below an example of a hiker about to slip and take a fall:
___________________________________________
Enhance your hike by reading:
The day hike gear section at Camping equipment checklist
Thunderstorm and lightning safety includes the answer to the question: Why can’t you swim during a lightning storm? A strike on a lake doesn’t kill all the fish in the lake.
backpacking advicehas these sections: Must bring for each large group (or perhaps for each couple or person), Must bring backpacking for each person, Some (crazy?) people think these are optional for backpacking, Backpacking luxuries(?), Do not bring these backpacking, To keep down on weight backpacking, Don’t rush out and buy, BACKBACKING FOOD, Low-cook backpacking foods, Yosemite National Park WILDERNESS PERMITS, Leave no trace camping has these basic principles.
see also: Cell phones in the wilderness which has advice on how/when to use a cell phone to contact 911 in the wilderness and a warning about interference between cell phones, iPods and avalanche beacons.
 You can’t always expect a helicopter rescue
The use of cell phones for photography (with or without a selfie stick) has made preventable injury or even death by selfie common They were just taking a selfie . . .
Can a person who is prescribed an epi-pen risk going into the wilderness? and some sting prevention notes are at: Anaphylaxis quick facts
Leave no trace camping and hiking has these basic principles:
Plan Ahead and Prepare
Travel and Camp on Durable Surfaces
Dispose of Waste Properly
Leave What You Find
Minimize Campfire Impacts
Respect Wildlife
Be Considerate of Other Visitors
During any long hike or backpack,
To truly be able to leave no trace and follow backcountry rules about camping the proper distance from a lake or digging your personal latrine hole the proper distance from water, etc., you will need to know how far 100 or 200 feet is. Lay out a tape measure at home and walk it and count your paces.
How to poop in the woods.
The there is no guarantee of rescue webpage
includes accident prevention tips many people who are experienced hikers and backpackers do not know about.
___________________________________________

The Yosemite National Park rangers would like you to call them
if you see a bear in Yosemite,
no matter where it is or what it is doing.
Since 2003 there has been a note in the Yosemite Guide: “REPORT ALL BEAR SIGHTINGS! To report bear sightings, improper food storage, trash problems, and other bear-related problems, leave a message for the Bear Management team at: 1 (209) 372-0322. Your call can be made anonymously.”
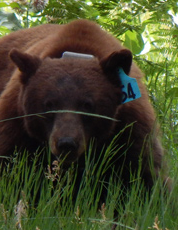
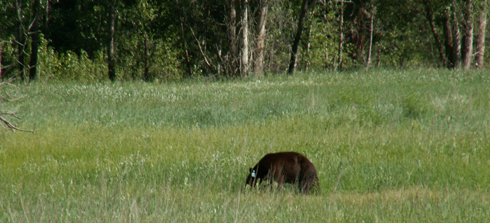
If you can, in all the excitement, try to notice if the bear has a tag (usually on the ear), the color of the tag and if possible, the number on it (the tag is large enough that with a telephoto lens you should be able to read the number).
From the Yosemite Daily Report newspaper:
“It is extremely important to remember to yell at bears that are in and around development, even if they are foraging on natural food. Though it is very tempting to get close for a picture, or just to watch these incredible animals, it is important not to give into this urge. Yelling at them if they are in residential areas or near people is critical to keep bears natural fear of humans. Giving bears plenty of space. When bears become too comfortable around people, they will often start causing damage to structures and vehicles, or will even become too bold around people, creating safety concerns.”
And the Yosemite Daily Report also said:
“Scare bears when you see them. . . in developed areas- Yell like you mean it!
Make as much noise as possible, try waving your arms, stomping your feet
or anything to make you look intimidating and to get the bear to run away.
We know it’s fun to see bears and it can feel mean to scare them,
but this is a simple way to truly help save a bear’s life.”


